How to make a lariat necklace!

create your necklace in 5 easy steps

by Mojo Mama

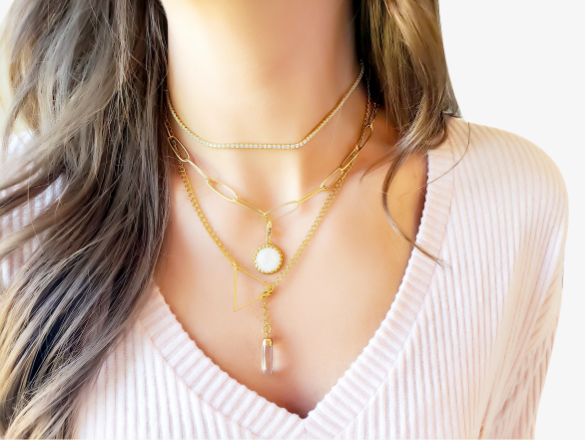
Lariat necklaces have been around for years and are a fun and unique way to customize your jewelry daily. Wear it as a choker, a headband, a belt, a knot or tie… With so many ways to wear one, a lariat necklace is a must-have in your jewelry box! 

A lariat necklace is quite simple to make and can be done in about 1 minute. Yes really! The key to a lariat necklace is to have enough chain (at least 2 feet but you can go longer depending on how you want to wear it) and that your shape is large enough to fit your charm through. This will allow you to feed the charm through the connector shape to hold the chain in place throughout the day. 

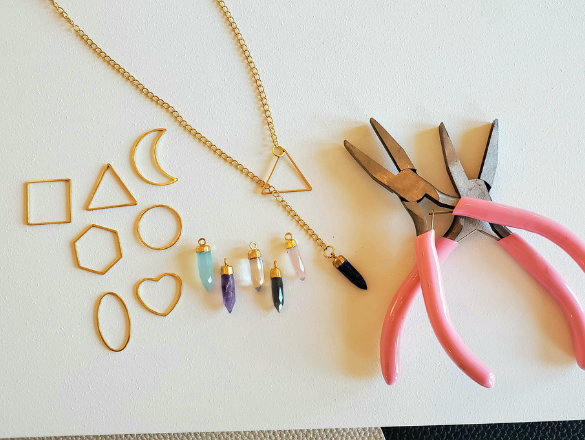
To make your necklace all you will need is some chain, a shape for one end, a charm for the other end, some jump rings, and pliers! Check out our list below for links to grab the supplies used in this tutorial. 

Your Mojo connector will come with the jump rings needed!

Supplies Needed:

Now that you have what you need, lets get started! Check out the video below for a quick tutorial or check out the steps below. 

5 Easy Steps to Make a Lariat Necklace

Step 1: gather your supplies and tools

Step 2: grab one jump ring with your pliers and twist it open

Step 3: add one end of your chain and your connector shape to your jump ring and twist it closed

Step 4: grab the other jump ring with your pliers and twist it open

Step 5: add the other end of your chain and your crystal pendant to your jump ring and twist in closed

Ta-da! You now have your very own lariat necklace! You can easily change up your look by swapping out your shape and charms. So have fun letting your creative freedom fly! Be sure to tag us on social media to show off your creations with #goodmojo. Happy creating!